
Configure Discord Bot in OpenClaw
Before start, please ensure both your LCMD and your network have internet access.
1. Create a Discord Server
Step 1: Create a new Discord account here https://discord.com/register
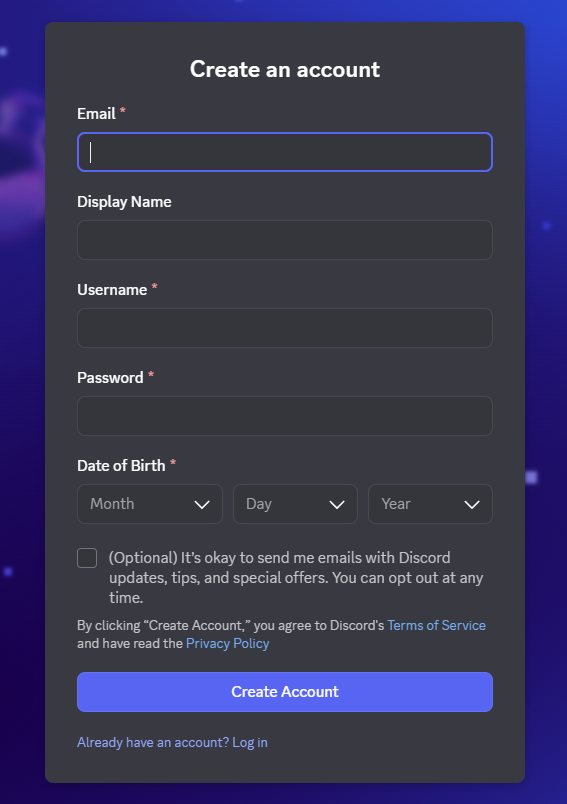
If you already have a Discord account, just skip.
It is recommended to download the Discord desktop client from https://discord.com/download for easier use and testing later.
Step 2: Create a Discord Server
You will need your own server to test the bot. If you already have a server and admin privileges, you can skip this step.
Click + on left side → Create My Own → For me and my friends → Customize the server name as needed → Click Create.
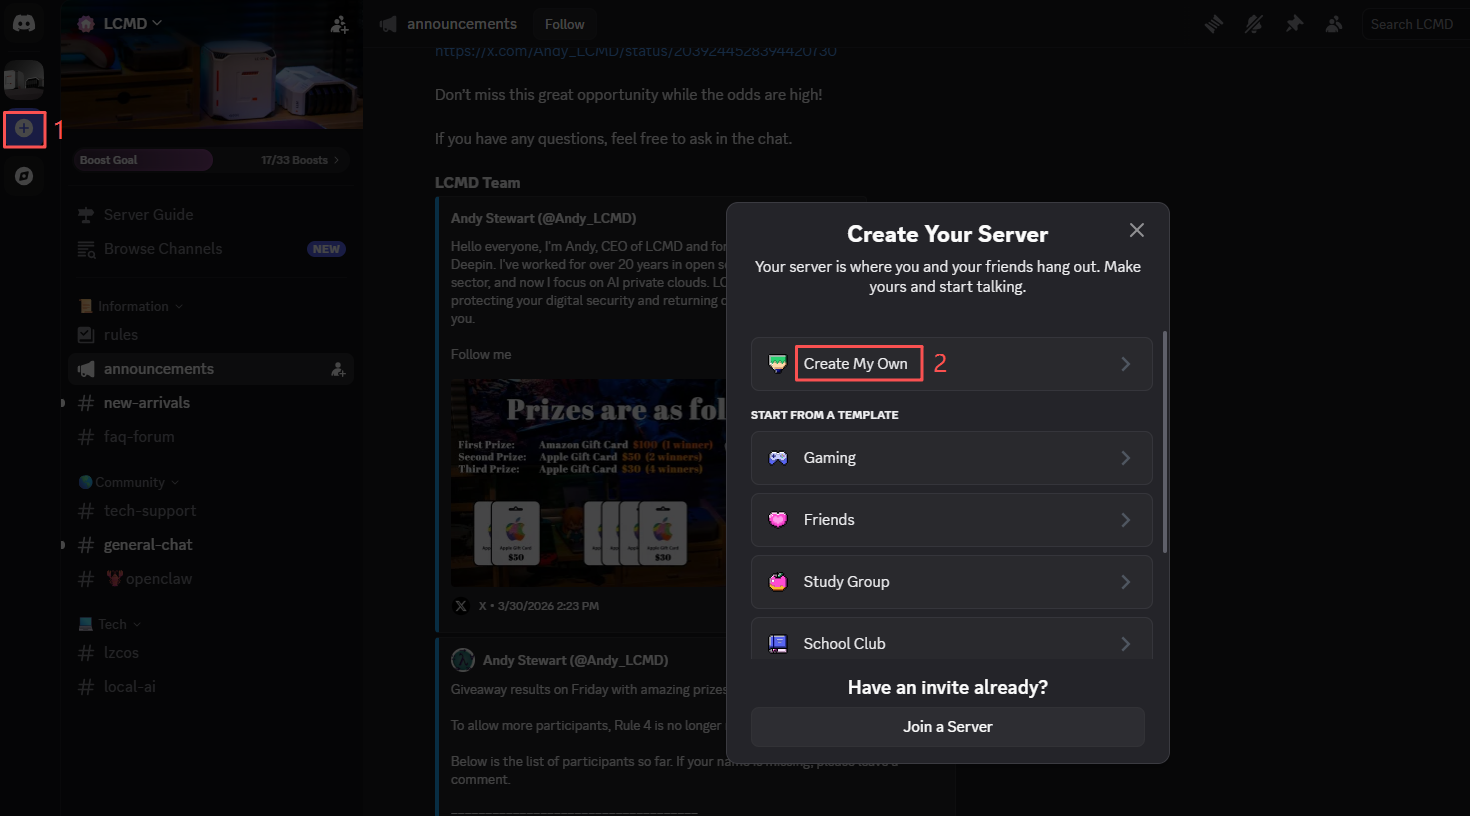
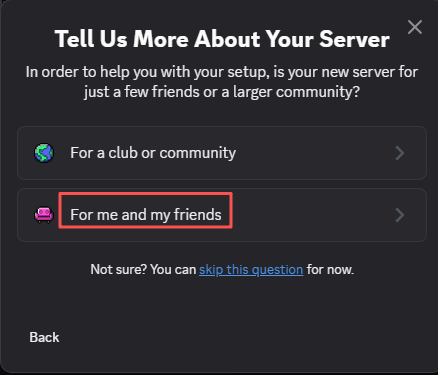
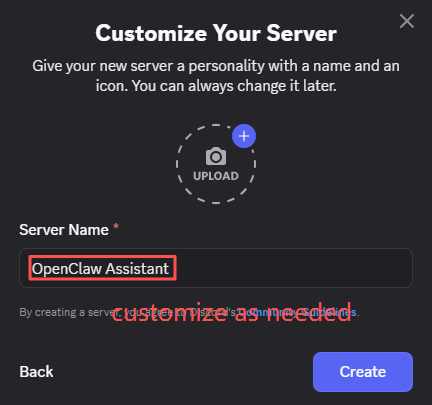
Once created, you will see a #general text channel automatically displayed on the server, where you can test the bot.
2. Create a Discord Bot Application
This is the most crucial step — creating a Bot application in the Discord developer portal.
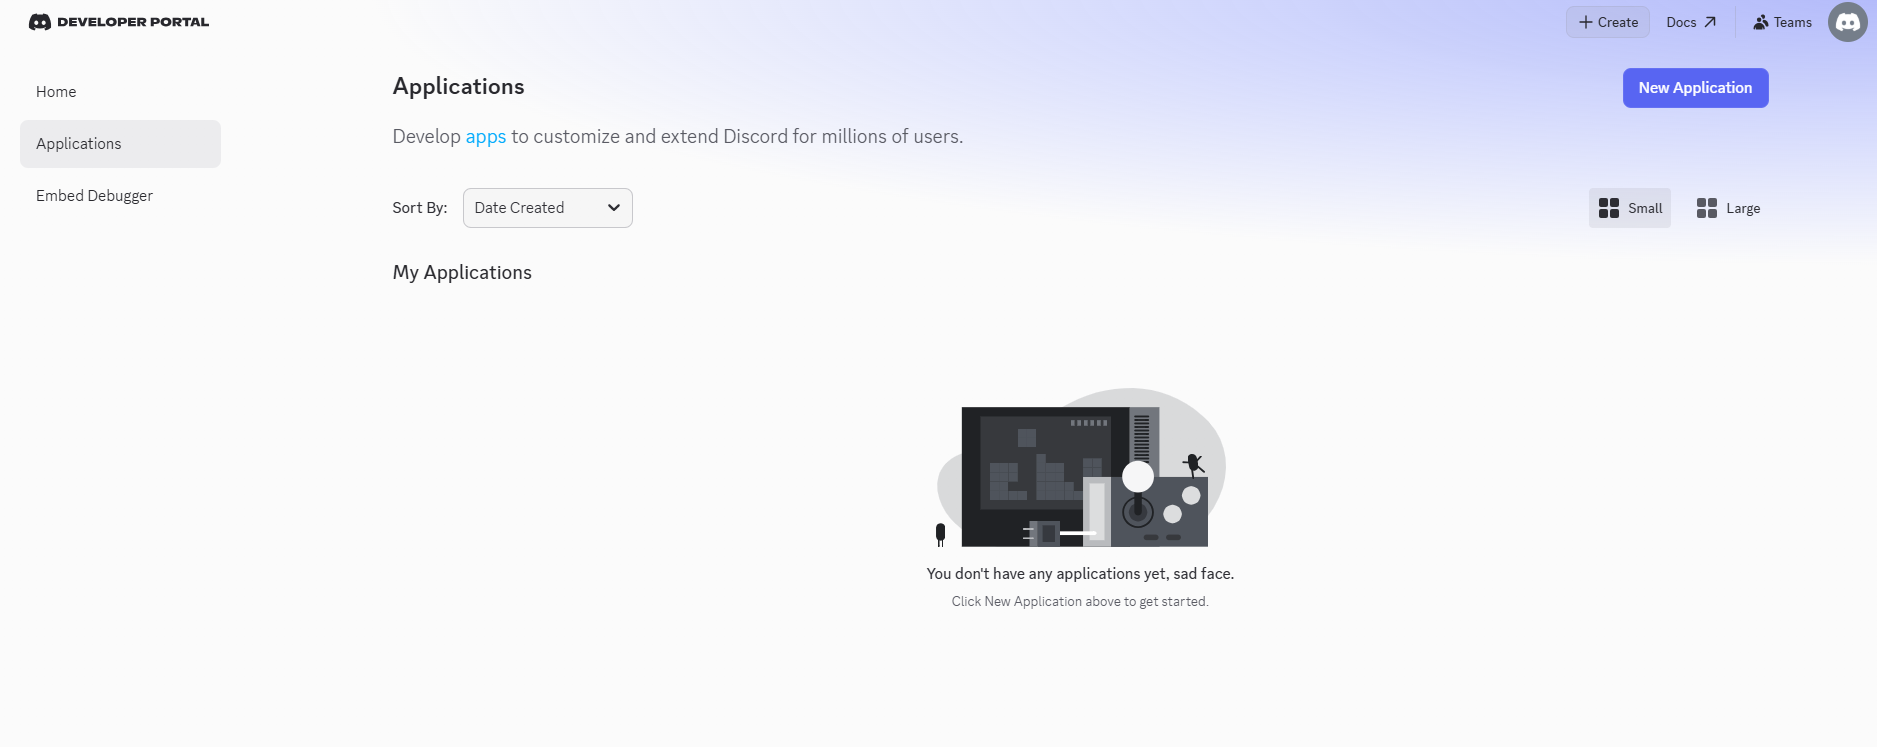
(1) Go to Developer Portal
Visit https://discord.com/developers/applications and log in with your Discord account.
(2) Create a new application
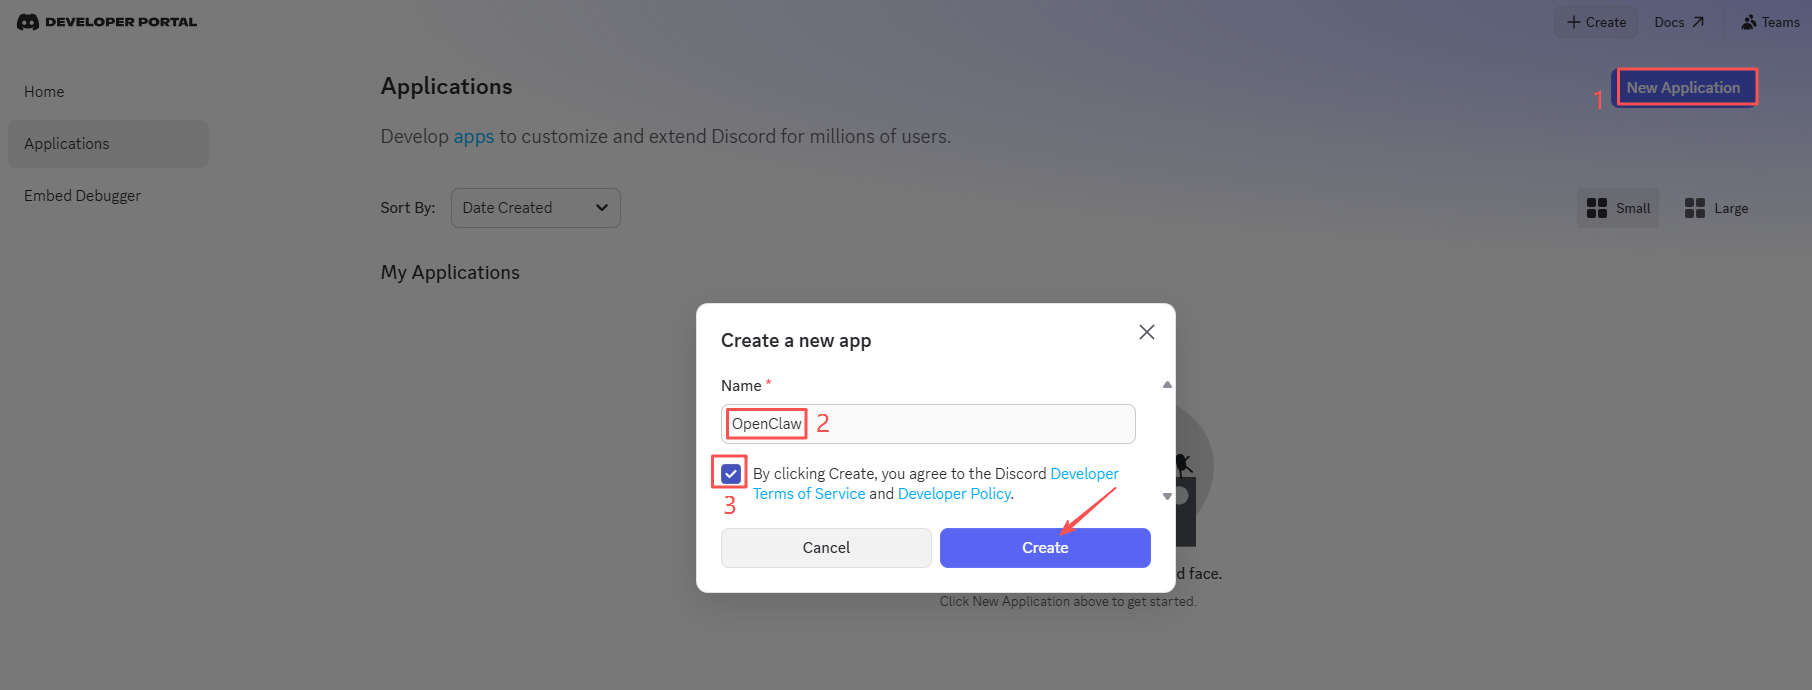
Click New Application → Enter application name → click the box before the terms → click Create
(3) Configure Bot permissions and intents
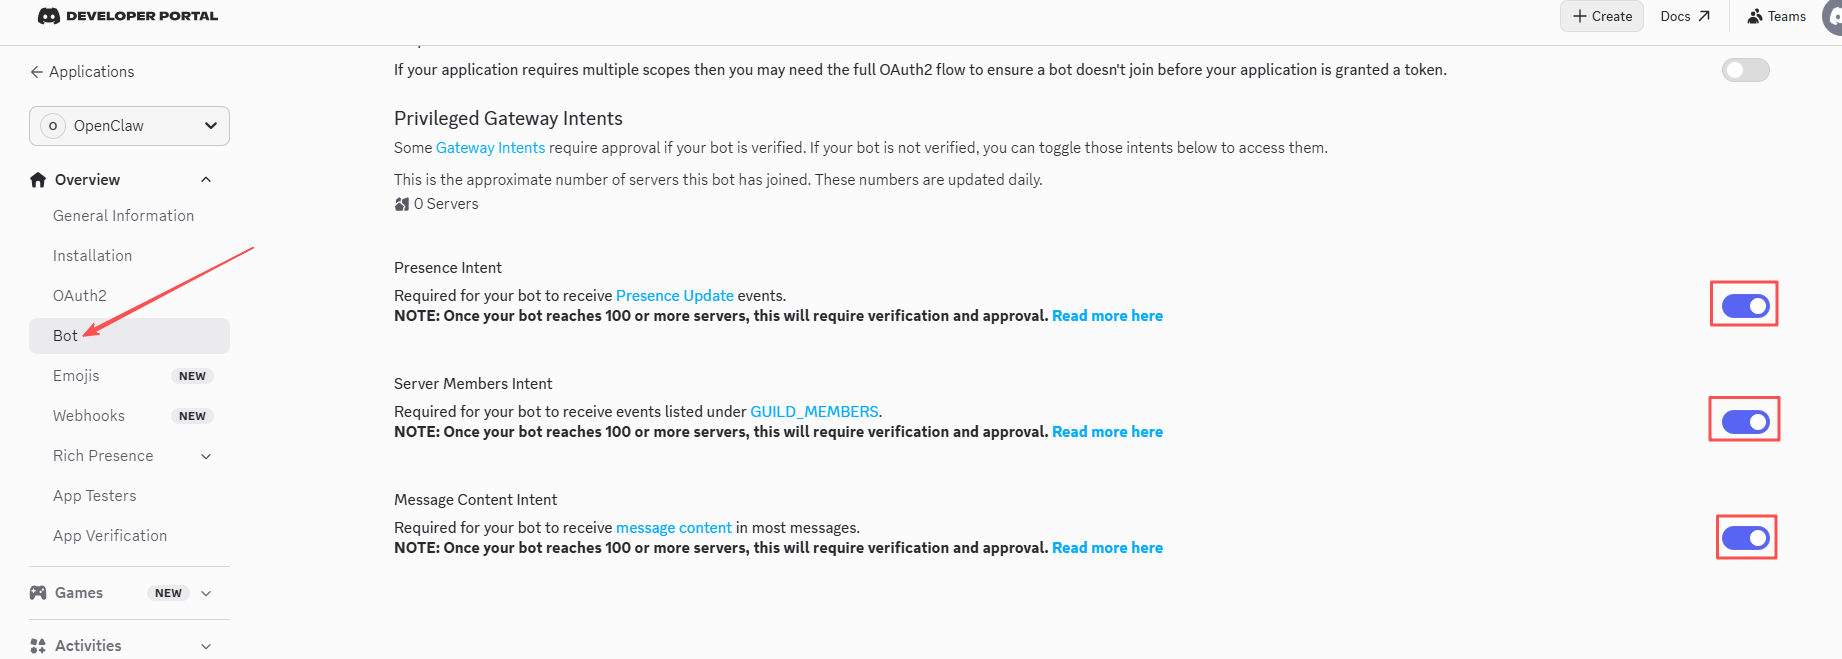
!!! Without enabling these intents, the bot will not be able to read message correctly.
Click Bot on left side bar, scroll down to find the Privileged Gateway Intents section, enable the following three switches and save the changes:
| Intent Name | Description | Required |
|---|---|---|
| PRESENCE INTENT | Allow the bot to obtain user online status | Recommended to enable |
| SERVER MEMBERS INTENT | Allow the bot to obtain the server member list | Recommended to enable |
| MESSAGE CONTENT INTENT | Allow the bot to read message content | ⚠️ Must be turned on |
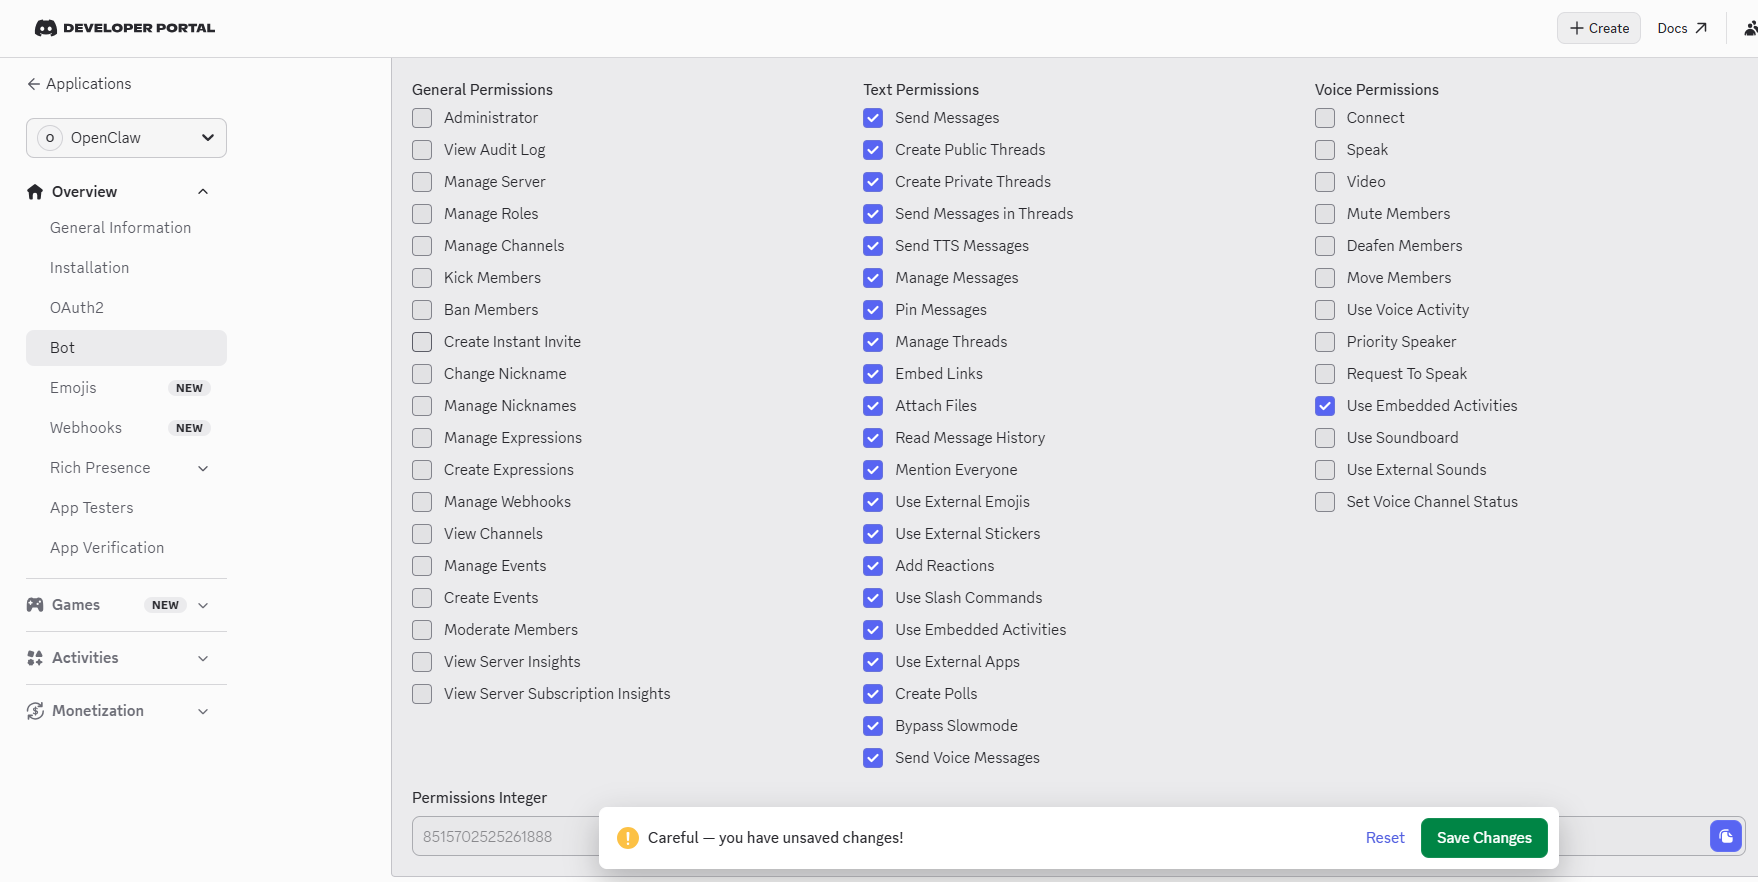
(4) Select permissions based on your preferences.
(5) Get Bot token
The token is the "password" of the bot, and OpenClaw needs it to control your bot.
Click Bot on the left side → Find the Token section → Click Reset Token → Click Yes, do it! → enter your password → Copy and Save the Token.
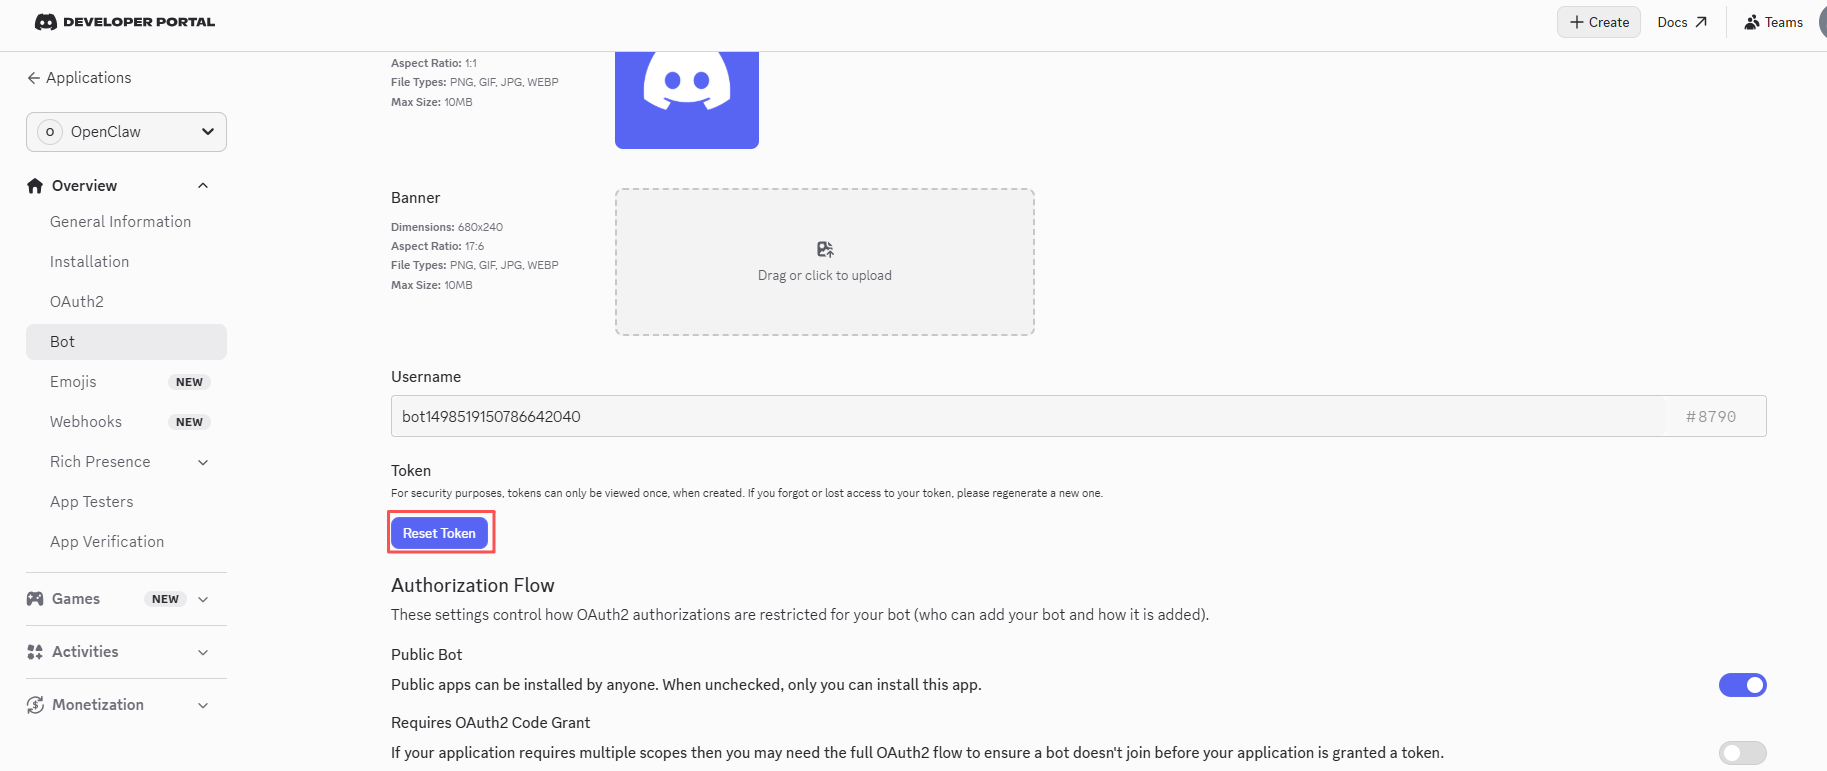
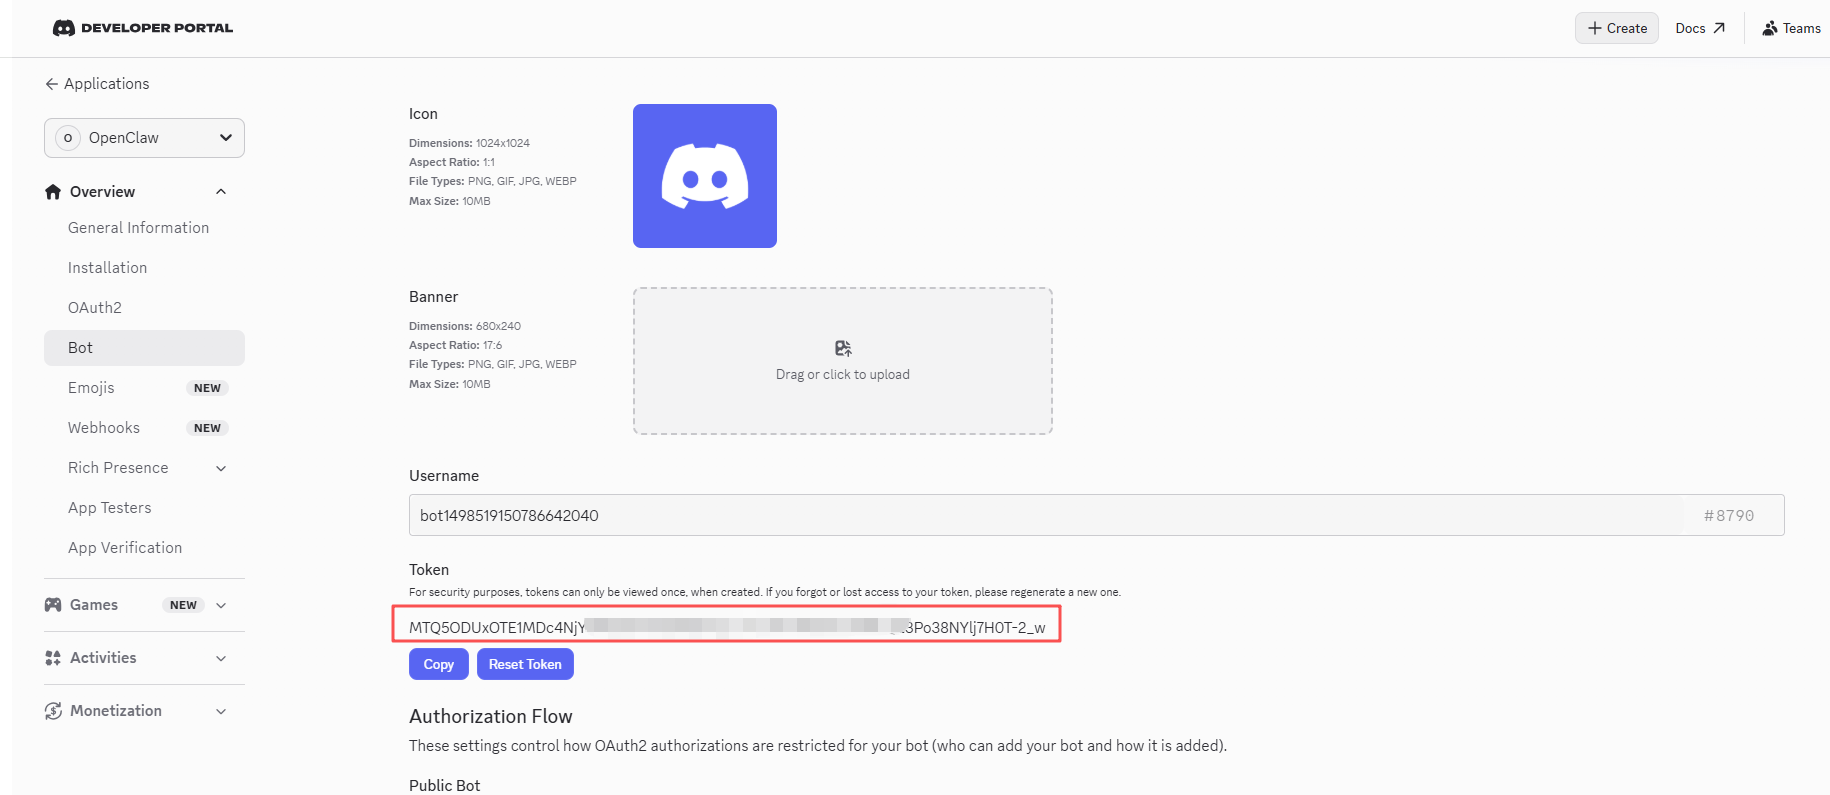
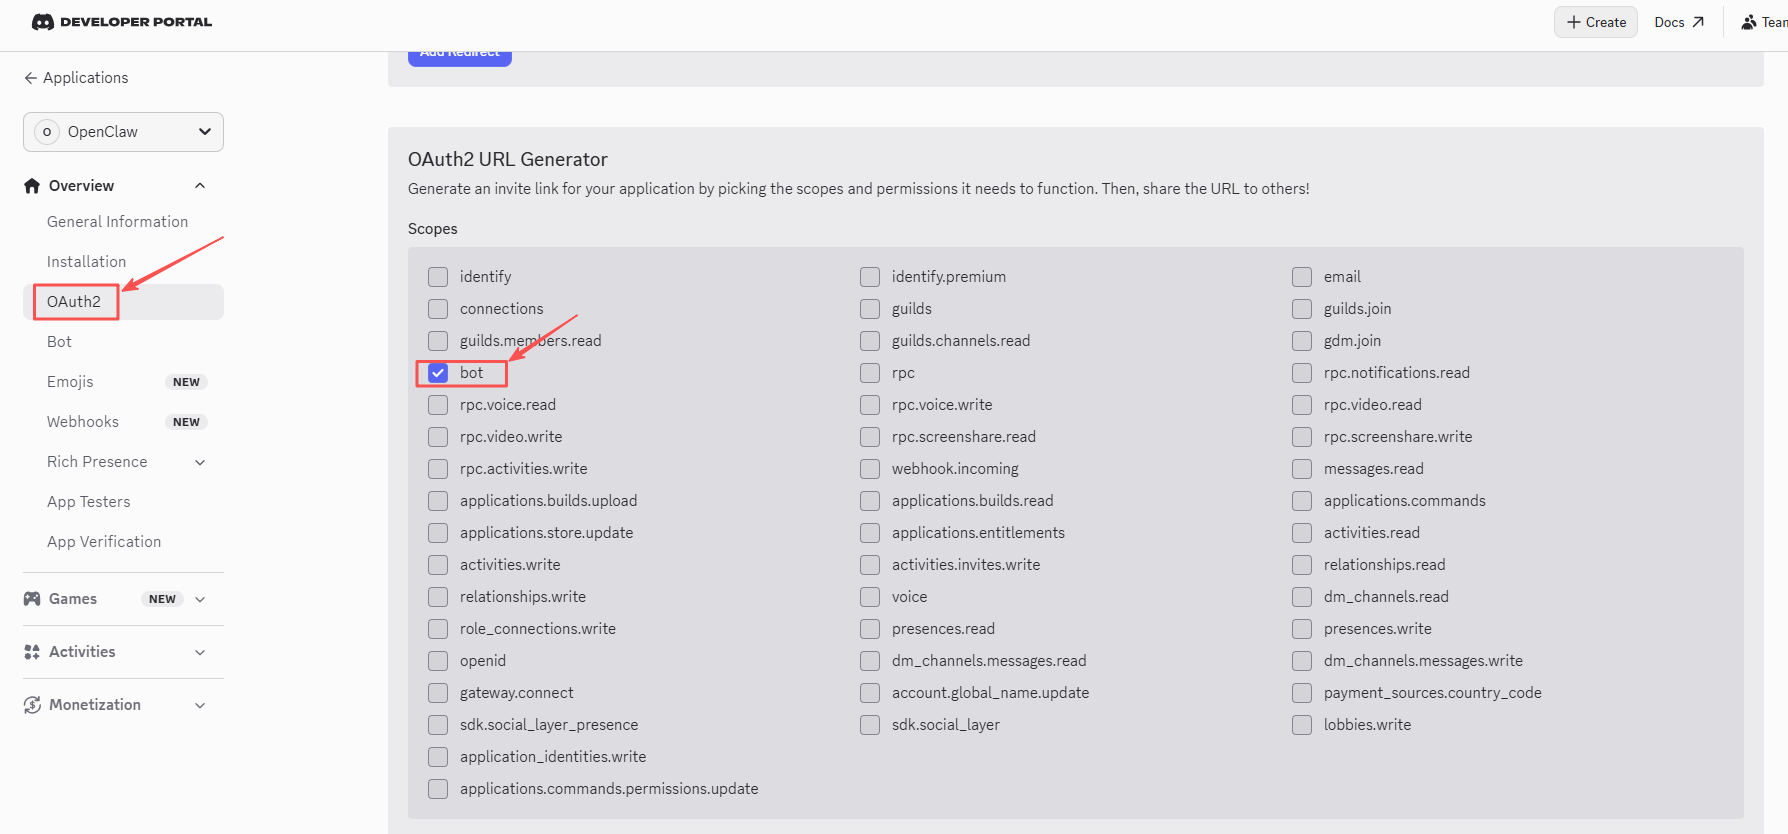
(6) Invite Bot to your Server, generate invite link first.
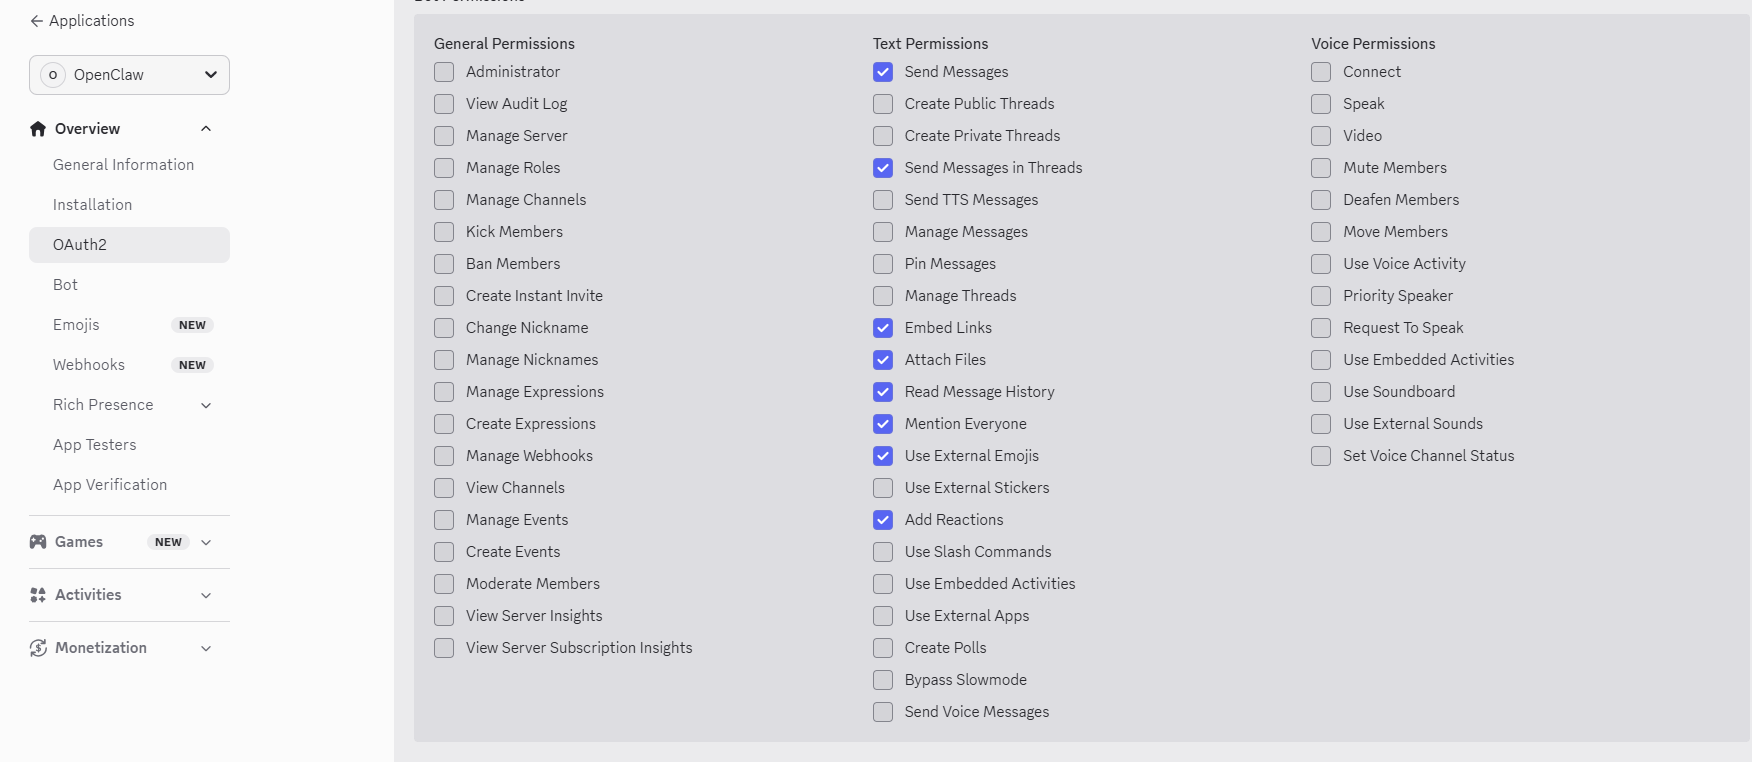
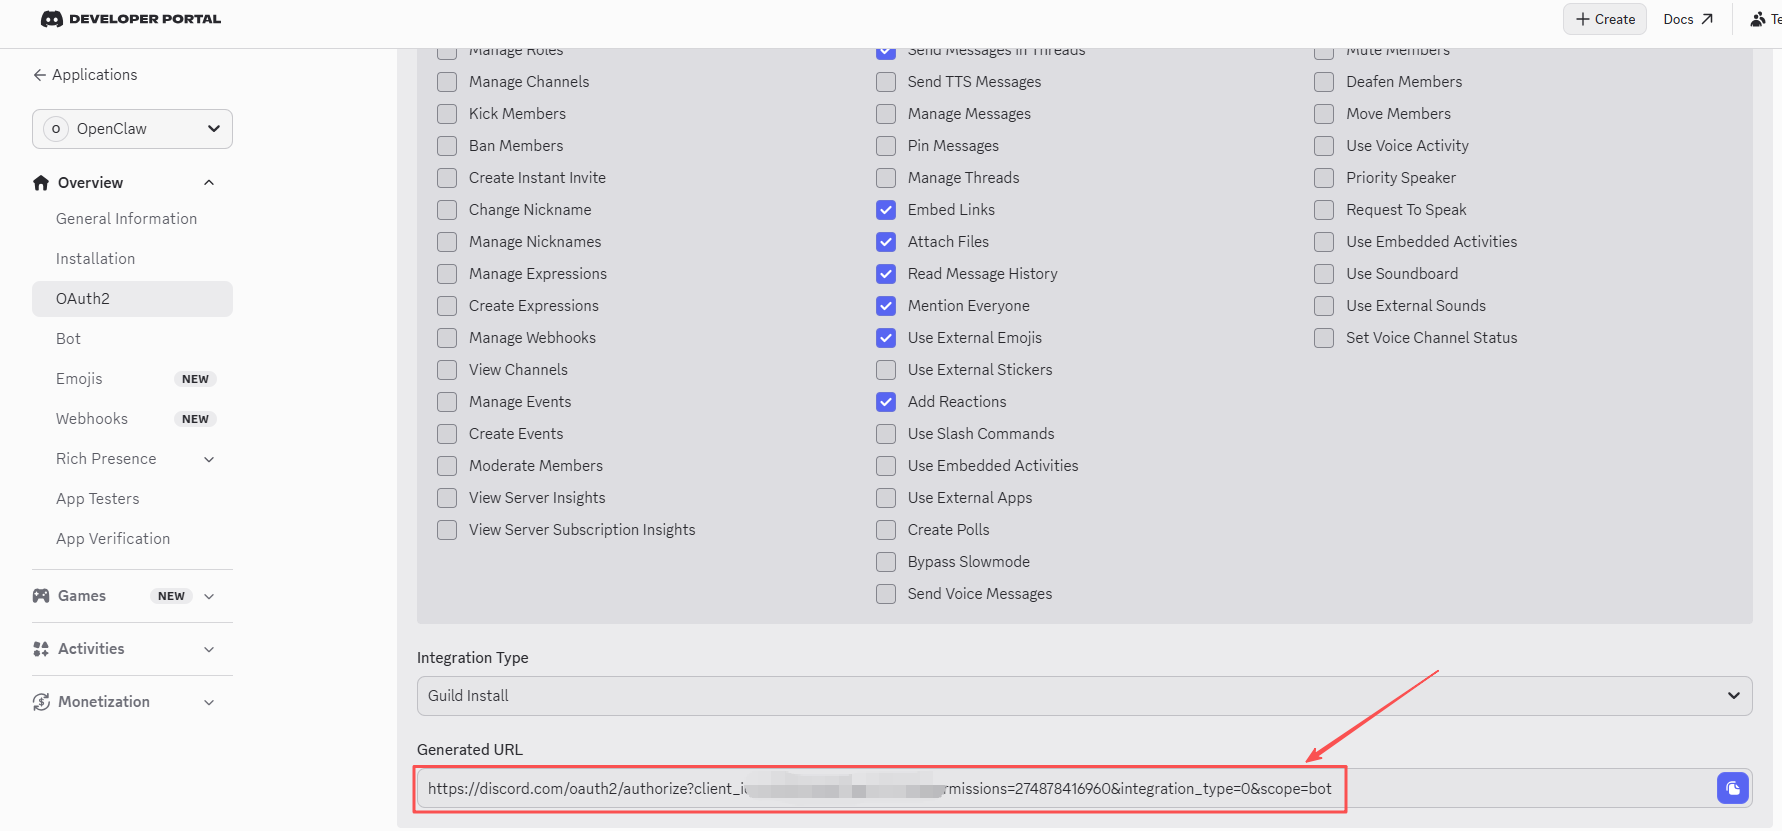
Click OAuth2 on left sidebar → go to URL Generator section → check the box before Bot → check the boxes of permissions as below:
✅ Read Messages/View Channels
✅ Send Messages
✅ Send Messages in Threads
✅ Embed Links
✅ Attach Files
✅ Read Message History
✅ Add Reactions
✅ Use External Emojis
Besides, you can also select the options according to your needs.
(7) Invite bot
A GENERATED URL will be automatically generated at the bottom of the page.
Click Copy → Open this link in your browser → In the pop-up authorization page, select your server from the drop-down menu (e.g., OpenClaw) → Click Authorize → Complete the human verification.
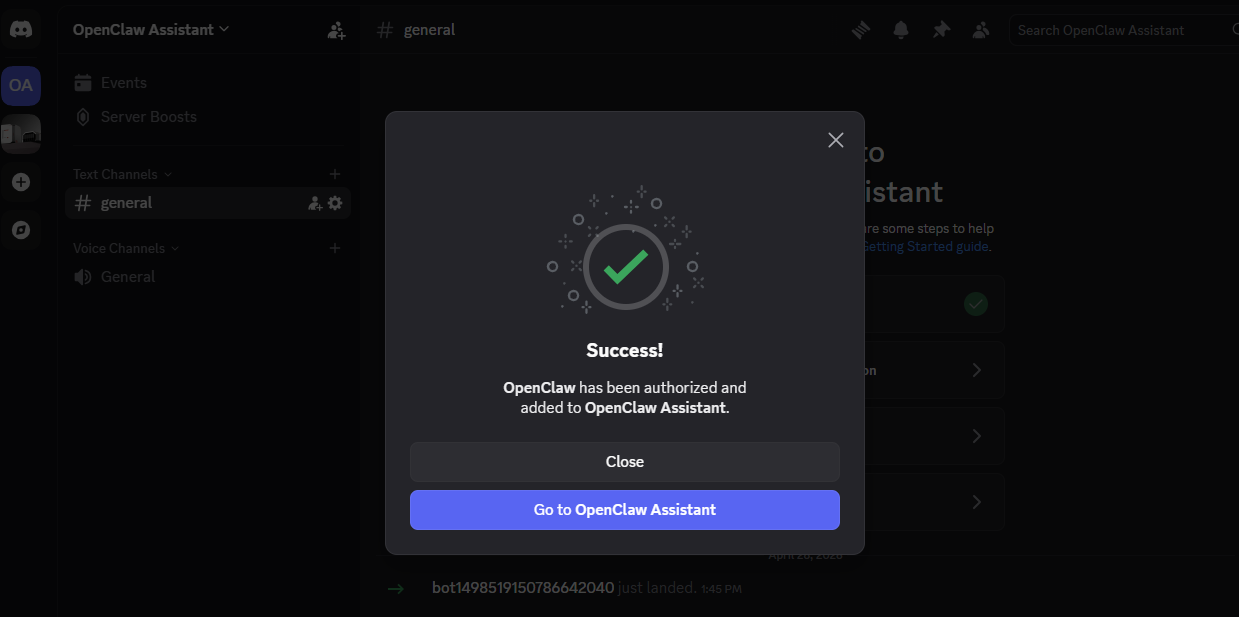
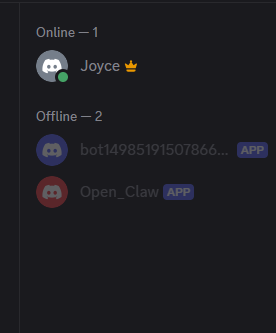
Once invited, your bot will appear in the server’s member list. It will show as 'Offline,' which is expected since it hasn't been connected via OpenClaw yet.
3. Configure Discord in OpenClaw
Next, we’ll move on to the OpenClaw by editing the openclaw.json file.
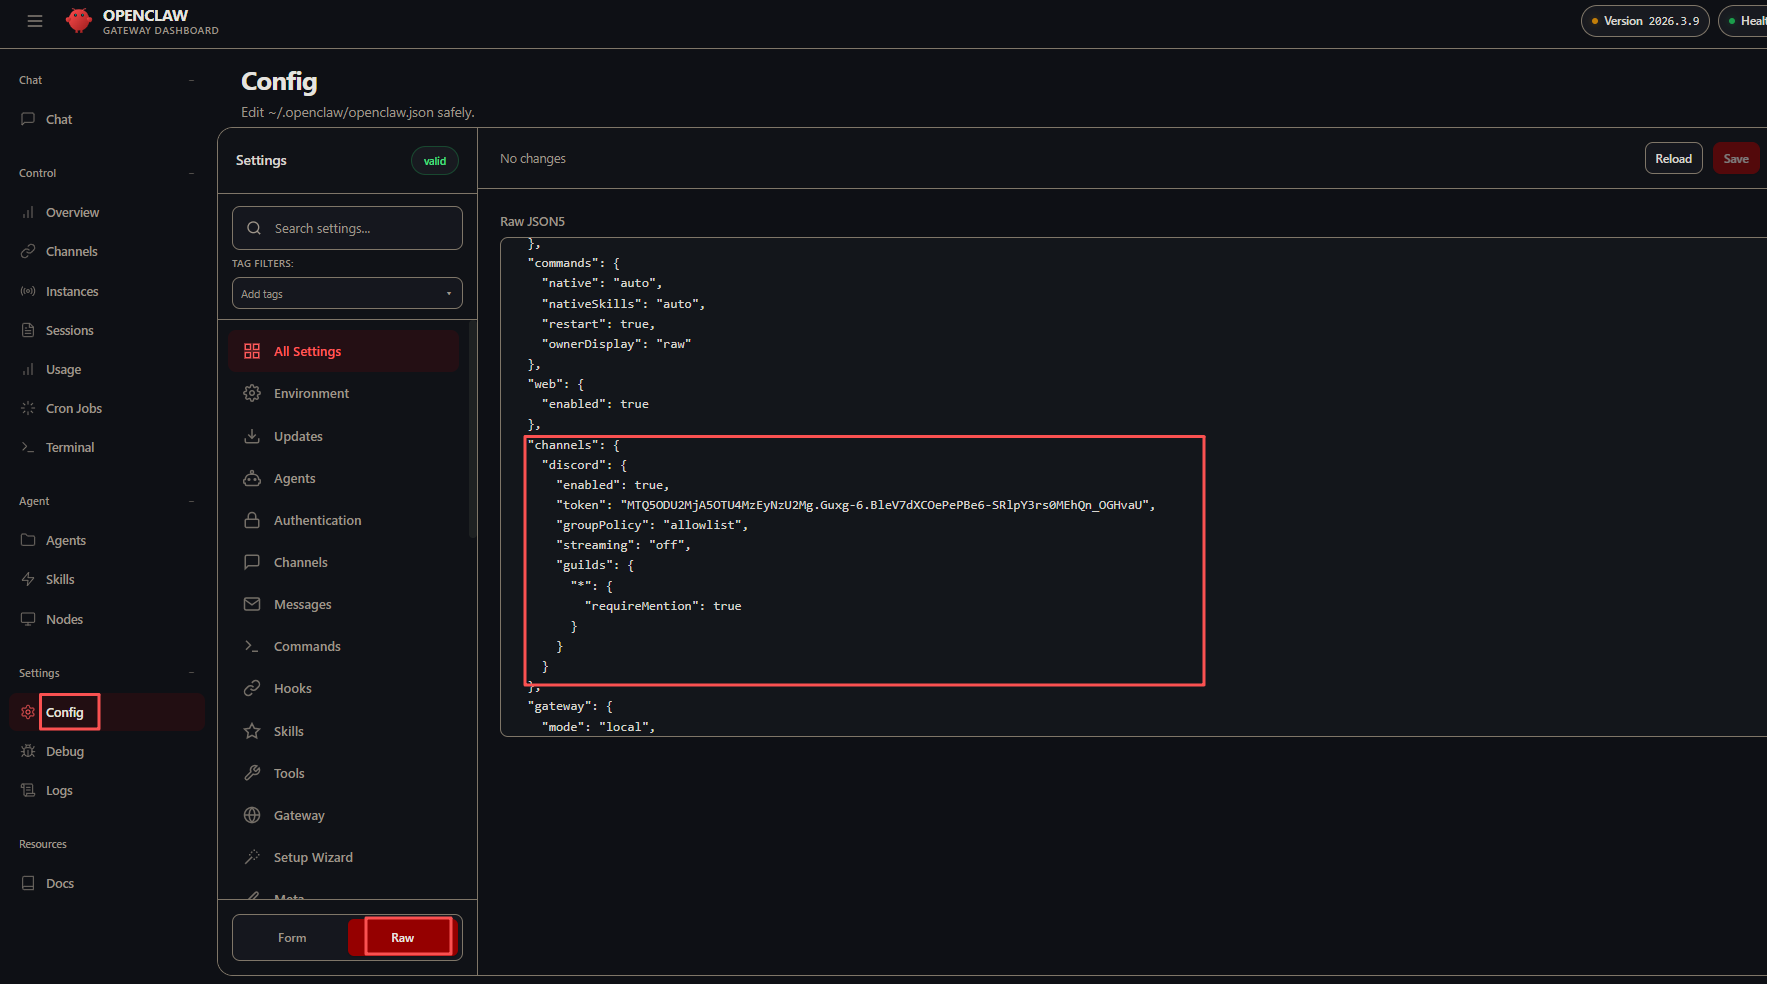
Step 1: Open OpenClaw, click Config, click RAW, and add a Discord channel configuration.
In the channels section, add the discord configuration:
{

  "channels": {
    "discord": {
      "enabled": true,
      "token": "Your Bot Token obtained from the above",
      "groupPolicy": "allowlist",
      "guilds": {
        "*": {
          "requireMention": true
        }
      }
    }
  }
}
Step 2: configurations instructions
| Parameters | Description | Value preferred |
|---|---|---|
enabled |
Enable Discord channel or not | true |
token |
Bot Token | Your token copied from above |
groupPolicy |
Group joining policy: allowlist allows only whitelisted servers, open allows all servers. |
allowlist |
guilds.* |
Configuration that applies to all servers | - |
requireMention |
Tag Bot needed | Group chat is recommended to be true; private chats will not be affected. |
Step 3: Re-start Openclaw once configured
Open Discord and go to your server. Check if the bot is showing as online (green dot).

Step 4: Test if the bot can respond correctly.
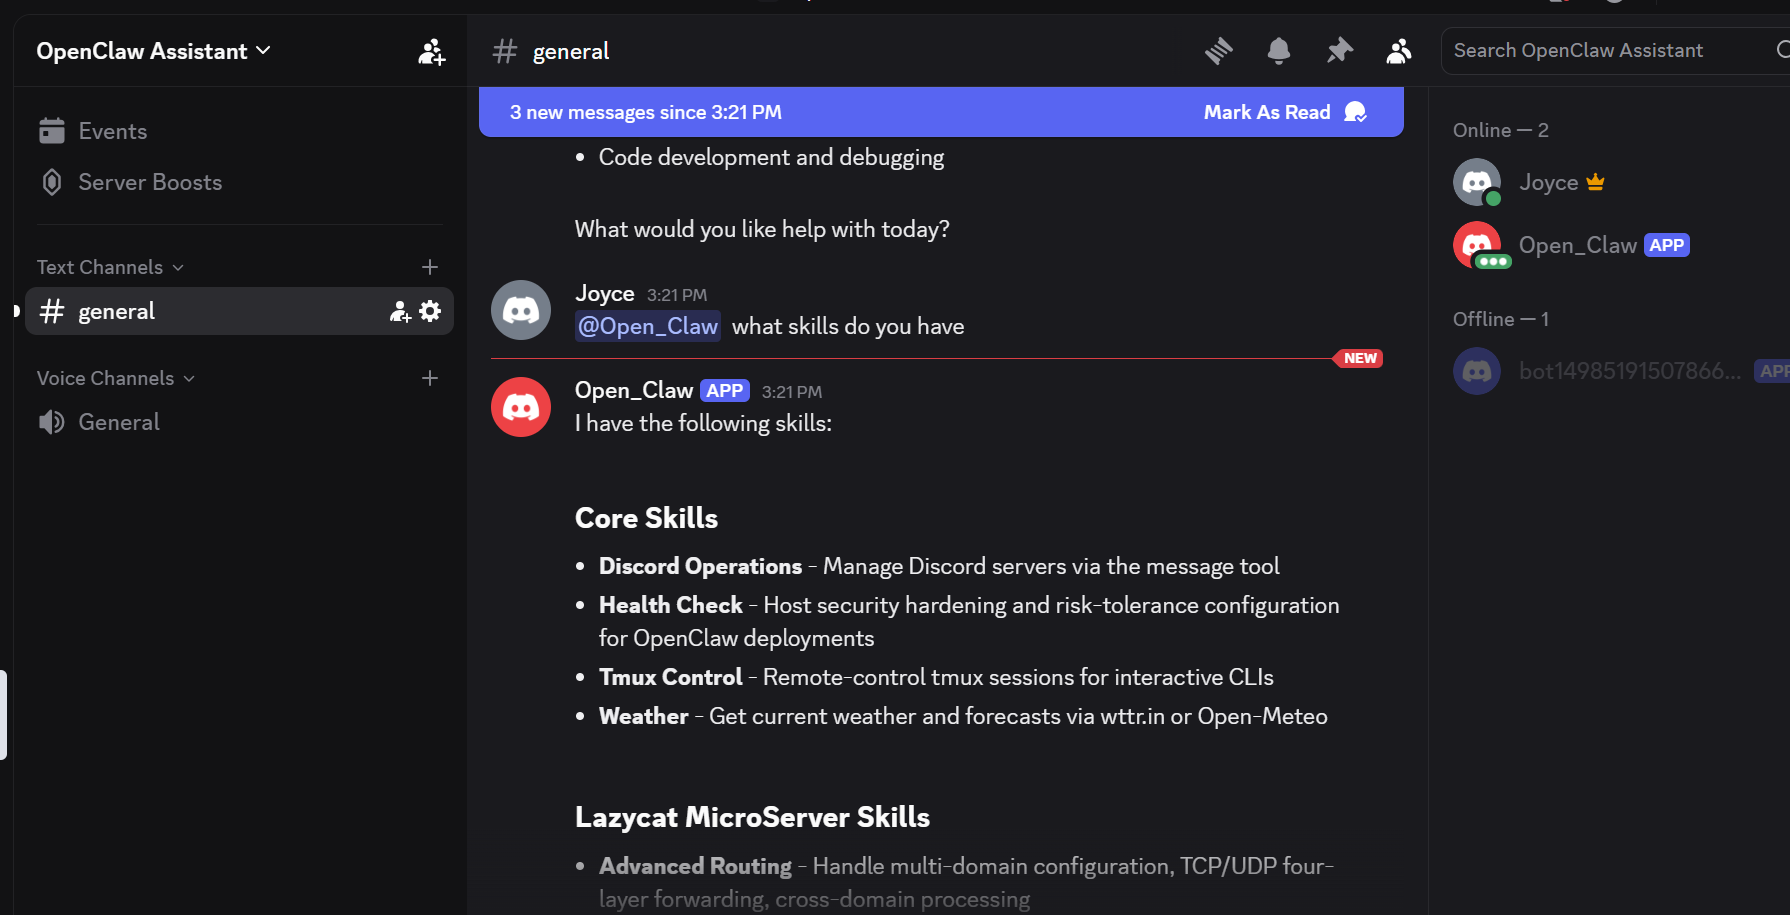
You have successfully configured the Discord bot in OpenClaw and can now have a conversation! Cheers!